Grand Tetons and More

Ahhh, morning in Wyoming. I’m an early bird so I’m up before Jeanne anyway. After relaxing for a bit, we head for the park showers. Nothing too horrible for public showers and early enough that there’s hot water. I’m a tad bit quicker in the shower so I’m out, dressed, and wandering around when Jeanne’s out 🙂

There’s a bit of frost on the bike. I moved it to a sunnier spot and the ice evaporates pretty quickly. Still after a discussion, we decide to head to Moran Junction and make a decision as to whether to head north to Yellowstone or south to Bryce Canyon. It is a nice day though.

At Moran Junction (just a three way intersection really), we finalized the discussion. To the north we can see dark rainclouds. To the south it’s mostly clear with some rain looking clouds farther east. Since in heading south we’ll actually be heading south with some west, we decided to head south anyway through Idaho and Utah to Bryce Canyon.

But first, some browsing through The Grand Tetons. Now I get to play with my iPhone a little. The Panoramic function of the phone looks pretty interesting and The Grand Tetons are, well Grand 🙂

I think I’ll be playing a bit more with Panoramic mode this trip. Still, the Nikon does a pretty good job too.

After a few more pictures, we headed on down to Jackson searching for Breakfast. We stopped down town and parked on the street. We did walk around looking for a place for breakfast but it seemed only one place was open and there was a line half a block long. We did walk around a bit more, just to take in the scenery.

Not finding a good place for breakfast, we did some snacking (I’d brought a gallon sized bag of mixed nuts and Jeanne had some trail mix so we didn’t starve 🙂 ) and headed on south. We took the scenic route through the Bridger National Forest and crossed over into Idaho east of Montpelier and then south to Bear Lake. At Garden City, we turned west to Logan. The idea to snag a late breakfast/early lunch and head south on 15 at least to the other side of Salt Lake City.

At the parking area above Bear Lake, we took a break and wandered around. It was a pretty nice view of the lake and there were a couple of hummingbird feeders. The little buggers were flying around all over the place.

The road from Bear Lake to Logan was a great deal of fun. In some places it was a touch tight but no tar snakes to speak of. Traffic was up there a little but the Hayabusa had enough power to get past when necessary. There was one car that was going pretty fast around the turns. Since I wasn’t racing anyone, I felt it no problem to stay behind. I was trying to indicate to Jeanne that the guy was a ‘rabbit’. Someone you’d follow farther back and let them deal with the Police. But they weren’t all that fast.

We stopped at a buffet for lunch. Not too bad a place I guess for a buffet. I’m not really a buffet person since I don’t eat until I pop, especially since I’m wearing my Aerostich suit that just fits right now 🙂 After lunch and on our way to I15, we stopped at a jerkey place for Jeanne. Pet a nice black and white fuzzy cat and chatted with the biker owner. He asked Jeanne if she’d like some assless chaps 🙂

Once we hit I15 and headed south, there was no stopping. The Salt Lake City metro area from Orem on through Provo was just a big highway. I stayed on the freeway until the HOV lane ended south of Provo We headed down a little farther until we saw a sign for the Great Basin National Park. We were looking for a camping spot so hopped off the road at Nephi. We got to the turn to the Park only to discover it was 150 miles away. Boy, what a bummer. In looking at the map, it’s in Nevada 🙂 We turned around and headed back to Nephi and stayed at the Safari motel. We dropped off our gear and headed on out for a walk around town. Nephi was pretty dead I must say. The only place we found open aside from the motel was the Dollar Store 🙂 I snagged a small roll of Orange duct tape to try and repair the leg tearing on the rain pants Jeanne was wearing and I snagged a soda before heading back. We read for a bit and hit the sack.

Posted in 2014 - Grand Tetons, Motorcycle Trips | Leave a comment

Grand Tetons and More

Got up bright and early Saturday morning and ready to head out. We’ve been checking the weather and it looks to be somewhat cloudy and even the occasional rain. We do have rain gear (my suit is water resistant) and colder weather gear since we’re heading north. Lowest overnight temp was 34* in Jasper so we are prepared. It’s a touch chilly so I have my over rain coat on and Jeanne has her gear plus my rain pants as it blocks the wind entirely so keeps you a touch warmer (keeps the heat in).

I’ve gotten help from friends to keep an eye on Slash and the house. Don’t want him lonely with me being gone.

Got the bike set up and ready to go. The tank bag looks a bit taller but it isn’t that bad. It comes up under my chin and still below the wind stream from the front of the bike. The tail light/brake light is visible from the rear so no worries there and the gear doesn’t weigh all that much. Two sleeping bags weigh in at 3 lbs each so it’s all fairly light. Just bulky.

We headed north on I25 intending on making the left to head west on I80 just at Cheyenne heading to The Grand Tetons. I expect to make it to the camp ground near Moran Junction before 6pm. The bad thing is the winds are crazy. There are 35mph gusts and the wind pushes pretty hard. My gas mileage for the day averaged 38mpg. Generally trip averages are closer to 46mpg. I figured I’d get less due to Jeanne being on the back but not 8mpg less. We got to one of the rest areas on I80 and pulled off just to take a break from the wind. Check the flags. They’re straight out!

We made several stops for breaks due to the heavy winds plus it was a bit on the cold side, colder than we’d expected. I figured there’d be some chill but it’d warm up through the day but no such luck. And it constantly looked like rain. We did seem to miss a majority of the rain though.

On 287, on the Wind River Indian Reservation, we ran into a quick stop while the road was being worked on. About 5 minutes or so total. I hopped off and snagged a couple of pics.

Towards the end of the Wind River Indian Reservation, I spotted a nice pic where the clouds were low enough to be called fog.

As we headed into the Shoshone National Forest, we decided to stop in Dubois for dinner. It was an interesting Cowboy Cafe place.

I snagged fish with potatoes and a mixed veggie bowl. The veggies were canned mush consistency. Jeanne had the Elk sausage/Buffalo sausage and sweet potato fries. It wasn’t too bad over all. One thing though. We overhead the waitress say they’d had snow overnight. When asked, she hoped the pass was clear since if it snowed in Dubois, it was likely it snowed at the pass as well.

On the way up to the pass it got a bit colder. There were blue skies though of course but with clouds. Still, the chill was a bit of a concern. I don’t mind it being a little cold and I’d have just pushed on. But this was Jeanne’s first longer trip and she may not be ready for a long, grueling trip. We’ll have to discuss it later. Still, it still was a pretty nice day for a ride.

At the top of the pass we stopped at the rest area to hit the bathroom and since this is supposed to be a pretty good viewing area of The Grand Tetons. However it was all pretty clouded over so no real view. While we were waiting though.

Snow! It’s fricking snowing. This does not look good. We got geared up and headed on down to the Teton Wilderness and our first camp site. We got to the RV place I’d used a few years back and decided to snag a cabin. We got our gear out and set up ready for the night.

One of the silly things I’d forgotten about these things from last time I’d been in one of these cabins is the bed is made for someone 6′ tall. At 6’2″, I was pushing against the base with my feet or had my feet hanging over the edge. It wasn’t the most comfortable arrangement. The next day I thought I could have just thrown the pad down or even the mattresses down and slept more comfortably on the floor but it didn’t occur to me.

Before going to bed, we read a little of course. I went outside to walk around and see what I could see. There was what appeared to be a beaver in the water behind the cabin. I only saw him briefly. And The Grand Tetons were there of course but hidden by clouds.

Posted in 2014 - Grand Tetons, Motorcycle Trips | Leave a comment

Grand Tetons and More

I’ve been doing some prep work to get the bike ready for a week long ride to Canada (Jasper/Banff National Park) in June with Jeanne. With the recent discovery of the bearing problem which I replaced and the additional work I did with normal maintenance tasks like tire, brakes, fluids, etc, I think the bike is ready to go.

I’ve used Microsoft Streets and Trips for years to help plan routes. It has several nice features that I haven’t seen on Google maps so I can plan for stops, gas, etc.

Proposed Route:

I’d planned the trip to head to Canada to visit the Jasper/Banff National Park plus check out other sites on the way up and back. The Grand Tetons, Bear Tooth Highway, Glacier National Park, Medicine Wheel National Monument, and The Snowy Range. As always, I plan on alternates in case of problems. Since this is Jeanne’s first longer trip, I wanted to make sure we could turn around if necessary or otherwise return should the trip become a problem. Either with me, the bike, or Jeanne.

Jeanne picked up a new sleeping bag. It took us several trips to try and find one that would zip up with mine. Unfortunately the only one we found was a down one that cost around $500 which was silly. We eventually found one that would zip up one side and left it at that.

With the gear all packed on the bike and ready, we were ready to head out in the morning.

Posted in 2014 - Grand Tetons, Colorado, Motorcycle Trips | Leave a comment

Maintenance Day

I needed to do some maintenance work to the Hayabusa prior to the trip to Canada. I had a set of rear brake pads already from a prior order and of course had all my normal consumables (brake fluid, engine ice, wd40, chain wax, etc…).

To do:

Replace the rear tire
Replace the chain
Replace the front sprocket
Replace the rear sprocket
Replace the rear brake pads
Replace the front brake pads
Replace the engine oil and oil filter
Replace the clutch fluid (DOT4 Brake fluid)
Replace the rear brake fluid
Replace the front brake fluid

Of course I needed to chase down the necessary parts. In addition, I needed to get a replacement chain breaker. The one I had (EK brand) appears to have gone out of business and I’d bent then broken the breaking pin last time I worked on the chain.

I hit Amazon for some parts and Motorcycle Superstore for the rest including a new rear tire. I’d had a Dunlop on it from a couple of years back but I only got about 5,000 miles out of it. The Metzler Z6 tires I normally use had given me almost 14,000 miles on one occasion. I ordered a Z6 from Motorcycle Superstore. Generally I try to get local but the store I was using apparently went out of business.

First off, remove all the bits from the bike. I removed the side plastic and then removed the rear tire. I broke the chain at the same time since I was getting a new one so I wasn’t too worried about it.

I removed the hub, removed the old sprocket and put the new one on.

I also removed the cushions from the hub because I was taking the rim and new tire to the Colorado Powersports folks in Boulder.

And of course removed the front sprocket and put the new one on. I only hand tightened the front sprocket since I needed to do a bit of cleaning before fully assembling it. In reality, I only scraped some of the wax out and didn’t make it spotless.

Over the following few days, I got most of my parts I’d ordered. I started off by replacing the rear brake pads. They were quite worn and just about to the metal. There’s a cover that snaps in place and then a pair of rods that hold the brake pads. Since they’re on the small side, to keep them in place, there are a couple of clips that hook over the rods and around the pads. Once done, you push in the fancy cotter pin.

The fun part is you can’t actually see anything so you have to feel where the little holes are in order to put the cotter pin back in. It’s a tedious task.

It might not be easy, but in looking at the old pair and the new pair, you can see there isn’t much pad left.

It looks thick but really, it’s almost paper thin at the top left there.

Looking at the brake from the top. It’s still attached to the brake arm so you can’t really spin it around like the front brakes. On the plus side, it’s much easier to push the pistons back. With the old pads, the pistons are pushed all the way in. You have to open the rear brake cylinder, clean out the old fluid, and stuff a rag in and then push the pistons back apart. In looking at the old pads above, you can see gouges in the pad material where I used a screwdriver to push them apart.

And the brake from the bottom:

Interestingly, there is a spacer piece that goes on the back of the pads. Since the brake action tends to wear the pads unevenly, these spacers have the brakes at a slight angle so the pads wear fairly evenly as you can see from the old pads. Put them in wrong, the brake pads wear unevenly and need to be replaced quicker.

And the tire remounted. You can just see the new brake pad in the center and there’s plenty of space between the pad and the rotor. Once new fluid is added, a couple of pushes on the rear brake lever seats the pads and we’re ready to go.

The chain was a pain in the butt as always. I wasn’t able to find the chain I normally use, again EK seems to be out of business. So I got the next one down. Unfortunately, the chain only came in 130 links (I only needed 112) and in either Red, Blue, or Gold. I decided to go with Red since I have a few other red things on the bike. Generally it’ll be a bit dirty so a bit of red isn’t going to be all that big a deal.

Plenty of overlap. I’d already used my new chain breaker with the old chain without much trouble so didn’t anticipate any issue with the new one. However while I was using the tool to push out the pin, the tool pin shattered inside the chain. So I had to scurry down to the local Kawasaki place to get a new breaker. The pin was half way out and I couldn’t extract it with pliers. The new one seemed a bit less complicated and seemed to be just for the 530 type of chain. I seated it all and finished the extraction without any further issue.

I used the press to put the chain back together and then the anvil to spread the pin heads a little to keep it from coming off. I even used a caliper to make sure I pressed the plate on to the same width as the other links of the chain.

That was probably the biggest piece with the rear brake being the next difficult. The rest was pretty simple.

I changed the oil and oil filter. I’m using a different filter this time so we’ll see if I experience any difference (K&N vs a stock one). I also got the clutch and brake fluids changed out, also pretty simple in general.

I received my front brakes on Tuesday and proceeded to finish up the job. the old front brakes were in a bit better condition with about an eighth inch of pad left. But since I had new pads and was doing all this work, I went ahead and replaced them. The fronts are pretty easy. Unbolt them from the front suspension tree, turn them over, remove the cover, remove the single cotter pin, remove the rod, and the old pads drop out. Of course you have to press them apart first which is harder because you’re pressing against your hand. So not so much in the way of leverage.

I got them put back together without much trouble (the second brake is always the hardest) and the bike’s ready to go.

When I was putting things back together, I noticed a crack in the coolant reservoir. I wasn’t sure so I pressed on it and it disintegrated. After some pushing to test the area, I have the full opening. I didn’t realize until later, but that’s just the size of the exposed part of the reservoir.

I’ve ordered a replacement along with a replacement for the rear seat release cable. The tip had broken off months back and I used a zip tie to hold the cable in. I had to cut the seat off in order to get into the “trunk” so I could remove the rear plastic and replace the dead brakelight bulb. Anyway, that’ll also be coming in and I’ll be able to repair the rear seat as well.

I took the bike out for a test ride. Everything seems to be running exactly as expected. I do note that the front brakes had to be carefully used several times in order to get them set. At one point, I grabbed them and they stuttered a little. After a bit more riding, they seem just fine so all is well.

Ready for the ride to Jasper/Banff!

Posted in Maintenance, Motorcycles | Tagged , , , | 1 Comment

Riding to Devil’s Tower

Jeanne and I have been planning an overnight trip on the ‘busa. She’s only ridden one other bike (a Goldwing she thinks) just once so the 4 or so rides we’ve done including a Peak to Peak ride are a lot. Since we’re also planning a ride to Jasper/Banff in June and in August a ride to GenCon in Indianapolis, I wanted to an overnight ride plus a camping trip.

Initially it was planned as a quick ride around Colorado but the weather’d been looking bad all week. Not constant rain but periodic heavy rain showers. I checked further out and found if we headed north, we’d miss some of the rain. Then we remember it was a three day weekend. So Saturday was spent getting the bike geared up so we could head out Sunday.

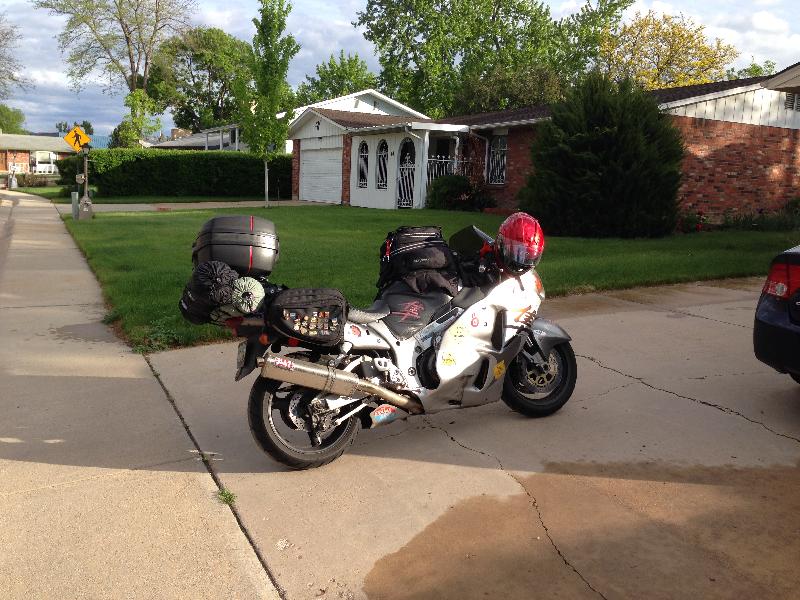
Since we’re camping, I’d tried a couple of spots for the location of the sleeping pad and tent but they’re long enough that they obscure the brake/tail light. I was going to try going with out the trunk but we needed the couple of bits of extra room. I even added the third tier of my tank bag which brings it up to just about my chin 🙂 I had ridden with it before but it kept getting buffeted by the wind. This time though I have the Double Bubble keeping it out of most of the wind (although side winds kept pushing it left).

But it seems we had everything configured correctly. We tested out the brake light and it was fully visible from behind. On the ride back Monday, I tied an extra strap around the middle to bring it up a little higher.

Off we went. First stop was in Ft Collins to get gas. We’d started out with half a tank and it was a good spot to check the bike to make sure everything was cool and to check with Jeanne to make sure she was good. It was chilly so we had scarves and gloves plus a sweatshirt just to stay warm. At one point I had my heated grips on and Jeanne had tucked her hands between my thighs and the tank.

On the way I’d point to various sights like the missiles outside the Air Force base in Cheyenne. At the last exit before 85, we stopped again for gas. I had a banana and some cashews for breakfast. She snagged some yoghurt and trail mix I think. She had coffee and I snagged a Diet Coke. We sat at the bar in the Loaf and Jug and discussed the ride so far then headed out.

85 to Torrington then Lingle then a right turn towards Lusk.

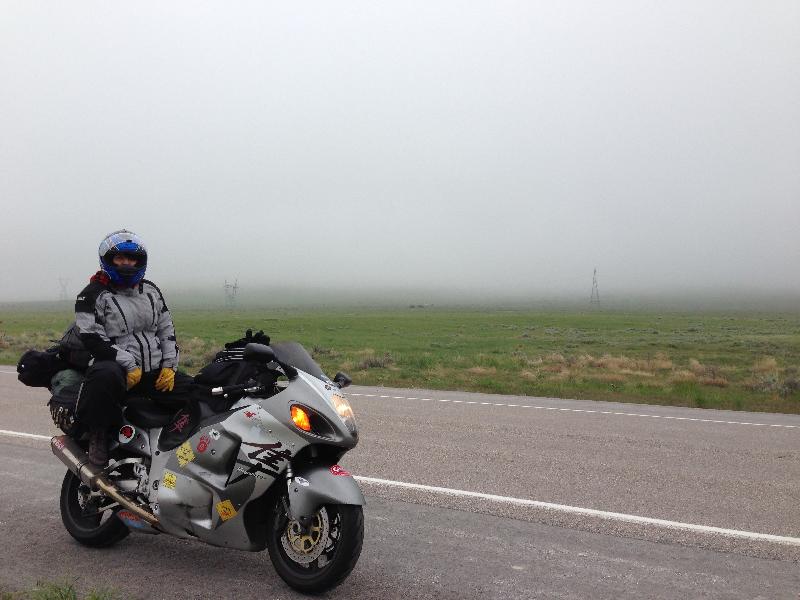
Between Lingle and Lusk, a gigantic fog bank was sitting. I thought it was maybe over a river or lake but it was just low hanging clouds. I’d been reading The Mist by Stephen King so the fog was quite impactful and cool 🙂 As the fog was clearing a little, I stopped the bike and snapped a pic.

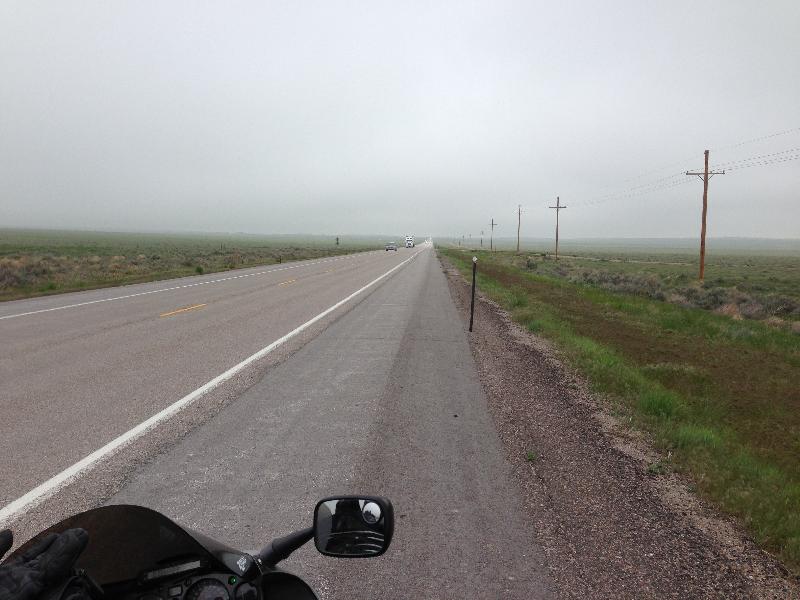
You can see ahead that the fog was starting to clear.

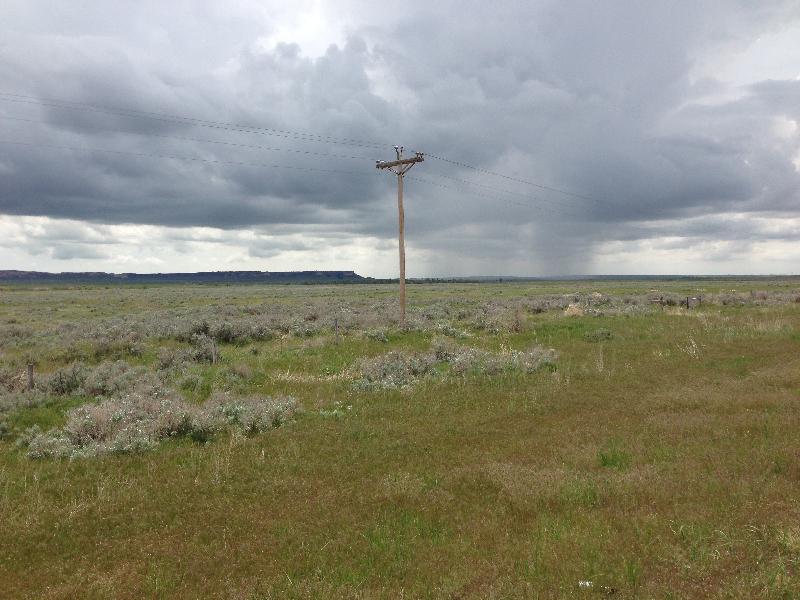
This was looking back, about 30 minutes from Lusk. We were seeing this most of the day. Quite dark clouds, mainly over The Black Hills area.

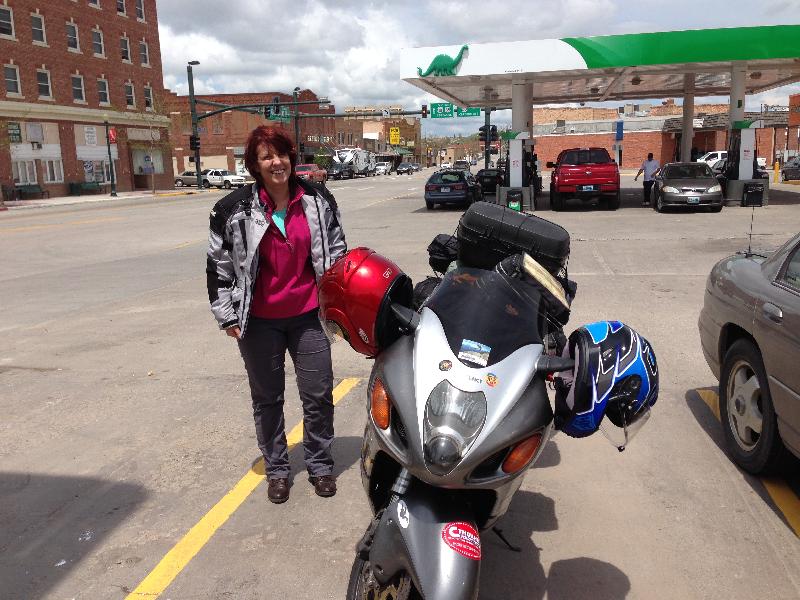
In Lusk we stopped at the normal stopping place for folks traveling that way, the Sinclair station 🙂 Took a break after getting gas and relaxed a little.

The rest of the way up 85 was pretty uneventful. I was checking out The Black Hills since it was taking so long to get to Devil’s Tower. The original intent was to camp on the west side of The Big Horns but I didn’t see that happening. It was getting too late to safely make the ride.

Just before 90, we rode through a quick squall but dried out quickly. After 90 and on the way to the park, I spotted a smallish turtle in the middle of the road, head stuck out. I stopped, turned around, and headed back. Jeanne hopped off the bike and chased him (or her) into the grass on the far side of the road. I figured it was just sunning itself but it picked a pretty bad place to do so.

After passing the tourist store outside the Devil’s Tower, we went through the gate and headed up. There was a dirt road to a scenic spot that I couldn’t resist. Looks pretty cool actually. Like a painting someone else told me.

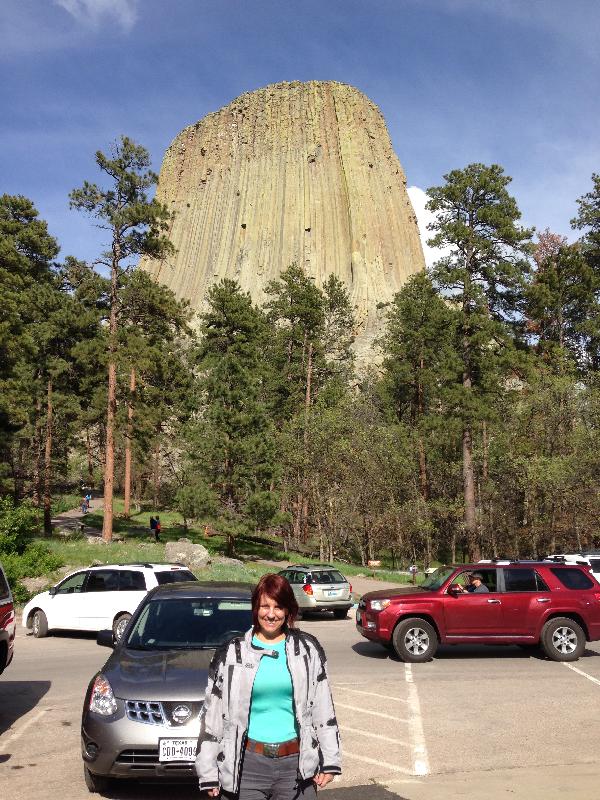
At the visitor’s center. Jeanne doesn’t look too much the worse for wear 🙂

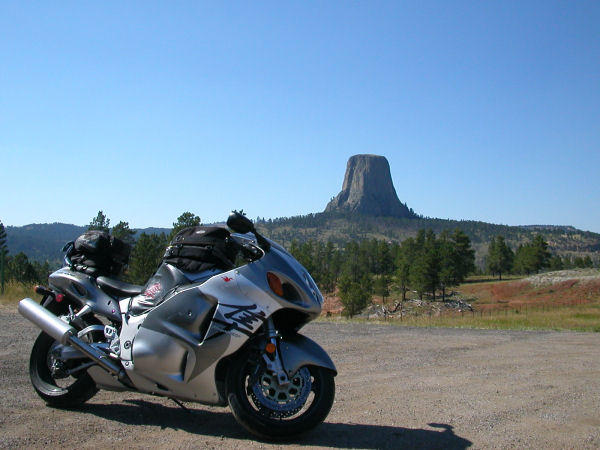
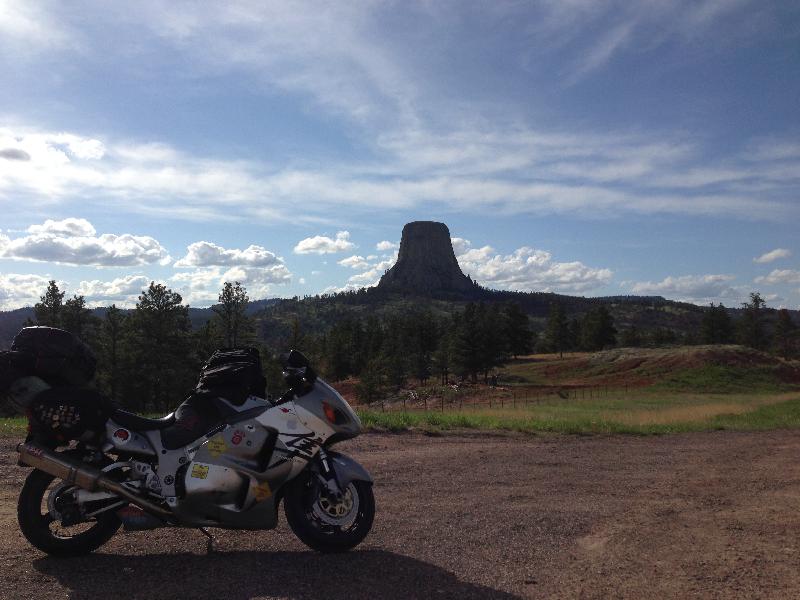
Nine years ago, I did an Iron Butt ride on my Hayabusa which included Devil’s Tower. Here’s that pic:

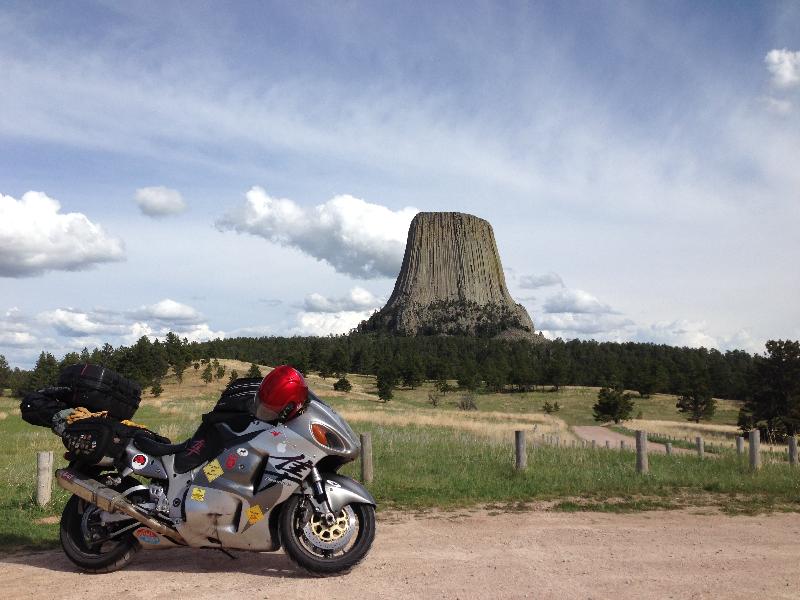
Here the bike at the same spot, a little later in the day (5pm ish):

Anyway, after that we headed out. In considering the time of day (5pm), when we stopped in Gillette for dinner, I was looking for a camp site. I didn’t think we were making Sheridan or farther west that night and the chain was feeling loose. I need to make the chain a little looser for riding with a passenger for the ride north next month. Plus I didn’t like the looks of the tire. But all the reviews on Google were pretty poor for camp grounds. And most are really RV “Camper” sites and not actual grass down put up a tent sites. I did some searching and just west of Buffalo on 16 was a park campground. One tenth in from 16. It would have us camping in the park and probably cheaper ($16). After a discussion, we headed on to Buffalo.

The next hour was pretty reasonable but all freeway riding. I could go faster because of the speed limit but had to be cautious due to the holiday weekend and all the cops being out in force. We’d passed several cops with folks pulled over and I wasn’t itching to break my record of no police speeding tickets (I had to change it from ‘no tickets’ when riding through Boulder a hidden, unmarked camera caught me doing 10mph over the limit; bastards!)

We made Buffalo without issue, stopped for gas and headed on through town following 16. As it was close to 8, it was still pretty light out but the sun had gone down. It was chillier of course and heading up into the Big Horns was getting us close to snow. Fortunately we got to the turn without issue, until we discovered it was a hike in campsite! We could park the bike and schlep in all the gear, or head back down to Buffalo and snag one of the many camp sites we passed.

We decided to turn around.

The first campground was closed but the second was open. It took a bit to get someone to come out but he was friendly enough and even knew what Hayabusa meant (Jeanne knew as well and knew the story about the Blackbird 🙂 ). The bad news? A part had broken in the communal showers and bathrooms. No water. I’m good with it since I can pee around back of a building or tree, but women are a tad different 🙂 Jeanne was up for it though and we set up camp.

Since she didn’t have a sleeping bag, I brought a couple of blankets in addition to my sleeping bag. I put the one down on top of the pad, then us, then the sleeping bag as a blanket and the other blanket in a pile by our feet to tuck into. The pad was just a touch on the small side but I was able to get comfortable half on my gear, pants, and shirt. I suggested she get a similar sleeping bag so we can zip them together for the Canadian trip. In general it worked reasonably well. It wasn’t too cold out so various parts hanging out wasn’t uncomfortable.

In the morning we got up, packed up the bike, and headed off to breakfast.

Now there is one thing to note about my normal riding. I tend to ride alone. So camp setup and break down are pretty ingrained habits. Jeanne tried to be of help and I used her mainly to hold things like the flashlight when I was setting things up and the bags and poles when I was breaking things down “hand me the tent pole bag, no the purple thin one” 🙂 Purple was the tent poles, green was the tent, black was the pad, and blue was the sleeping bag. So it was pretty easy. And of course everything in its place.

With the bike packed and ready to go, we headed over to town to see what we could find for breakfast. Being Monday and a holiday, I wasn’t too sure there’d be anything. We located a Carl’s Jr and dropped in there for breakfast then headed on south on 25.

The ride back was all slab and generally longer time in the saddle. We kept pointing out the antelope and deer we saw in the fields. At one point I stopped and we discussed a couple of things. She was having issues with her right foot getting numb. I asked if she could dangle her feet and of course she could so that was a new option that actually seemed to help her. I also commented that hitting a deer at highway speeds on a bike might prove disastrous. And later on down the ride, we saw a deer, well half a deer on the left and half on the right.

We did stop several times though. At one point I was thinking I could draw a few hand signals on the back of my helmet to help communicate better. At least for the Canadian trip 🙂 And thinking about a few work things like always.

Just before Cheyenne I could see heavy rain clouds. As I was zipping down the road anyway, I spotted an exit about the same time I spotted a cop in the right lane. I signaled and headed up the offramp. 🙂 I just wanted to make sure everything was protected. I use plastic bags in the saddle bags, trunk, and tank bag for protection. From the rain as well as the dust and dirt of travel. I put on my liner for my Joe Rocket jacket for rain protection and we headed on back out.

We did pick up a little rain as we passed through Cheyenne but not enough to be a bother really.

Coming down 25 into Colorado was interesting. There was a lot of traffic and plenty of left lane campers (one guy looked to be typing on a laptop in the passenger seat!) To the west were very dark clouds and clearly rain was falling. I figured Longmont was getting wet and to avoid traffic (which was getting heavier), I pulled off at 34 and headed to Loveland.

Now I’d been seeing plenty of cruiser riders out and about. Both two up and with his and hers color coordinated bikes and gear. But as we approached the apparent rain in Loveland, I kept seeing the cruiser riders making U-Turns at intersections. I guess riding without protection can get a tad damp 🙂

The rest of the ride was uneventful. We stopped at Chipotle’s for an early dinner and headed back to my place.

One part of our discussion was checking out the gear we took to see if we needed everything and making a quick list of things we might have forgotten. That way we’re ready for the trip to Canada.

Posted in 2014 - Devil's Tower, Motorcycle Trips | Leave a comment

Bearing Replacement

Since it doesn’t exist without pictures, I have a few to share 🙂

A few years back my front end was making a weird sound and rubbing but only when I made a left turn. I went to a Colorado Sportbike Club Maintenance Day in part to learn more about proper suspension setup but also to see if anyone could figure out what the problem was with the front end. It took a brief ride up and down the street for someone to have an idea. Turns out the left bearing had bailed. The guy at the maintenance day actually knew what he was doing and he took care of getting replacement bearings (fully sealed this time) and dust seals. I came by to watch as he put the bearings back in so I was knowledgeable in case it happened again.

The one on the right is the good one, well packed in bearing grease with the dust cover below it. The one on the right is missing a few bearings 🙂

Recently I had a similar issue. I was riding home and heard a click and slight bump bump bump. I pulled the front tire to manually check and the inside seat on the bearing moved just a little. Comparing it to the other side showed it shouldn’t move at all. When I removed the dust cover, look what I found:

Almost exactly the same.

Same here. The one on the right side is still just fine, still with the packing grease. The one on the left is in pieces 🙂 The top ring actually dropped into the center and over the center spacer to shine it up. While it looks somewhat in poor shape, it’s just a spacer between the bearings.

I chased down a set of replacement bearings on line (the same type again of course) and ordered a pair of new dust covers from the local dealer. The front bearings are 6205 bearings. The suffix determines whether it’s a Sealed, Rubber Seal, or other type of bearing. These bearings are ‘shielded’ and not ‘sealed’ bearings.

Here’s a bit more information on bearings:

Ball Bearing Guide To Rubber Seals Vs Metal Shields

Bearing seals and shields have been available almost as long as Ball Bearing themselves. However, the move towards more integrated bearing structures has meant that their importance has grown, moving them from occasional add-on items to intrinsic parts of the ball bearings which they protect. In some applications, the seal or shield is becoming an integral part of the bearing design rather than an extra that is added later.

The main impetus towards sealed or shielded bearings comes from the growing use of sealed-for-life bearings in items such as white goods, cars and power tools. Seals or shields are needed to stop the grease lubrication used in these bearings from leaking out. This is particularly important in applications where grease leakage may contaminate the product.

In most operating environments though, the requirement is twofold: to keep the lubricant in the bearing, while stopping moisture, debris and other contaminants from getting in.

Of course, while the seals and shields are providing their protective functions, the ball bearing is spinning, often at high speed. If its operating life is to be maximised, one factor that needs to be considered is the frictional effect of the seal or shield on the bearing starting and running torques.

Technical literature on seals and shields often blurs the differences between the two and the areas where one or the other should
be used. Essentially, shields are non-contact metallic (carbon or stainless steel) devices which allow high-speed operation but offer limited protection against the ingress of moisture and dirt.

Shields have no contact with the bearing inner ring, hence their low torque qualities. This structure also means that they are generally unsuitable for applications where the ingress of moisture is possible. But shields are better than seals at resisting damage from solid airborne contaminants, such as small flying stones.

Seals can be either contact or non-contact types. The former provide better protection than shields, but with reduced speed capabilities, while the latter can be used at higher speeds as well as offering the improved protection.

The most significant developments in recent years have taken place in the area of seals. Traditionally, ball bearing seals have been contact types made of rubber, usually with a metal backing. On smaller bearings, the seal is often made of glass-reinforced Teflon and is fitted using a snap ring.

Both types are effective at keeping out water, liquids and fine particles. However, the speed at which the bearings can rotate is constrained by the friction between the seals and the bearing inner ring.

The precise fit of standard contact seals means that a small vent hole is needed to ensure that a build-up of pressure in the bearing does not “pop” the seals and release the lubricant.

The challenge in recent years has been to develop seals which combine high levels of sealing with the high-speed capabilities of shields. NSK, for example, developed its V type seal for this purpose. In contrast to conventional seals, these non-contact devices are held in the outer ring of a bearing by the elasticity of the rubber seal material. With this design, friction is not a problem, so the bearings can be used at similar high speeds to those fitted with shields. However, compared to shields, V-type seals provide better grease sealing efficiency and resistance to fine dust particles.

V-type seals were originally developed for use on computer spindles, where high reliability and quiet operation are essential. Their use has since extended to many other applications. For instance, they have helped to ensure that the world long-track speedway champion has not experienced a single bearing failure on his bikes for four years.

Falling between the standard contact seal and V-seals is a newly developed class of light-contact seals which allow high-speed operation – although not as fast as shields or V-type seals. However, these seals (known as DW) perform far better in terms of moisture and dirt ingress protection.

They also offer advantages over the standard contact seals. The support for the main seal lip is long and thin, resulting in light-contact and low-torque operation. Starting torque is approximately half that of a standard seal, and running torque is also lower. In addition, the main lip touches the beveled portion of the inner ring seal groove where, if there is centrifugal force, dust is moved outwards. These seals therefore offer good dust resistance.

The main ring also has outward contact with the inner ring seal groove, so internal pressure does not open the seal and allow grease leakage to contaminate a process or impair the long-term operation of the bearing itself.

The trend towards sealed-for-life bearings has almost created a situation where the primary function of a seal is to retain grease rather than to stop contaminants getting in. This is certainly the case in “clean” applications such as in white goods and integrated automotive parts.

However, in adverse operating environments, the primary function of the seal reverts to protection. Often in such conditions, the protection provided by the standard seals is insufficient and specially developed types must be used.

In the most arduous environments, triple-lip seals can be fitted to protect a bearing and extend its life. These seals offer the highest levels of protection with three sealing lips making contact with the bearing inner ring. This configuration results in lower operating speeds, but in typical applications such as agricultural machinery, this is not usually a problem.

With Jeanne’s help, I put the new bearings and dust covers back on. I used a long threaded rod with three large washers on each end and bolts to seat the bearings.

The seat went in just a bit off kilter. I snagged a hammer and lightly tapped the edge to get it straight again and it slid right in.

Looking good, ready for the other side. I decided to put the pressed seal on the outside thinking that if it failed, it might not slip inside and muck up the center piece again. Or I’m just a little OCD and decided it should be on the outside 🙂

And the other side went on with ease.

I tried to use the same washer and threads for the dust cover but it didn’t work as well as I though. So I just lightly tapped it in on both sides with a hammer.

Since I was trying to figure out how to remove the dust cover, I had removed the left side rotor. So I had to put it back together. No problem with some blue loc-tite

I put the front wheel back on, again with Jeanne helping (she took most of the pics 🙂 ).

And away we went. Took a ride up into the mountains, down Peak to Peak to Nederland and back through Boulder to the bike dealer to get her a helmet and check out the C14.

Posted in Maintenance, Motorcycles | 1 Comment

New Guitar Day!

Chrismas 2011 I picked up a nice Ibanez Artcore. Sounded and looked great. After playing it a bit at home, I found it was too thick for me to comfortably play, at least at this time. I’ve spent the past year or so looking at thinner bodied hollow body guitars. I’ve played a few but haven’t been impressed enough to buy any.

Yesterday I went up to Estes Park to check out the roads in the mountains, spend a few bucks in Estes Park (difficult to access with the washed out roads so businesses are suffering), and deliver a care package to a coworker (a couple of games, a movie, and a six pack of Left Hand Brewery Milk Stout). On the way back I decided to stop in at Robb’s Music in Boulder and spotted a pretty Ibanez Artcore AM93-AYS in “Antique Yellow”. I snagged one of the guys and asked if I could plug it in and give her a spin. The Ibanez sounded excellent, nice and clear. It was in tune too which is unusual to me.

I asked if it came with a gig bag or case and he said that it didn’t but he’d see if he could chase one down and give me a deal on it. Sure enough, he had a slightly oversized case. The guitar fit but with some movement. Find for storage but I wouldn’t want to use the case to take the guitar out on tour 🙂

I paid for it and took it home:

Very nice to play and quite light. I just finished up a Rocksmith event of 6 songs and it went better than I expected. I’ve made a note of the setlist and the next event will be the same but with the Les Paul. Just out of curiosity.

One of the songs I tried was Rush’s Red Barchetta. The problem I have with it are the Harmonics. Normally you press the string to the fretwire and pluck the string to make a sound. Harmonics are where you lightly touch the string at certain places in order to make a tone. It induces a wave along the string and gives you that different sound. You can hear it in Red Barchetta. But I’ve been struggling with Harmonics on the other guitars. But when I played Red Barchetta on the Ibanez, the Harmonics were so loud and clear, it was like a spike in my brain 🙂

I went from fumbling around trying to get the G12/A7/D7 and A4/D5/G5 riffs to being able to play the entire Harmonic riff for Red Barchetta (G12/A7/D7/A7/D7/A7/D7/D7/A7) and have it be nice and clear, just like when I watch Alex Lifeson playing it.

I suspect it is partly the pickups in the Ibanez and possibly my getting better at playing. I’ve been avoiding these songs (along with I Miss You and Space Oddity) just because the problem I’ve been having with Harmonics.

Posted in Music | Tagged , | Leave a comment

Alaska Route Planning

Here is where I’ll list up the possible sights and scenery there is along with suggestions for routes for the Alaska trip.

One of the guys at work is from Alaska and recommended the Alaska Marine Highway. Catch the Ferry at Haines Terminal in Alaska and get off in British Columbia at the Prince Rupert Terminal. Costs are $212 for the Hayabusa and $160 for me (so $372 total). However under Special Fares, it says the Driver travels free so it may be just $212. Depends on whether the Hayabusa is considered a ‘Passenger Vehicle’. I’ll have to call.

Website is: Alaska Marine Highway

Times:

Haines -> Juneau – 4:30
Juneau -> Petersburg – 8:00
Petersburg -> Ketchikan – 3:00
Ketchikan -> Prince Rupert – 6:00

Total of 21:30 not including the times for the stops.

I’ll have to plan my route well in order to make reservations.

Posted in 2014 - Alaska Trip, Motorcycle Trips | Leave a comment

Prepping for Alaska

Back in 2008 I spent a few months planning a trip to the Arctic Circle in Alaska. Part of it was the trip of course, but another part was taking the Hayabusa on a longer dirt type road and getting a Denver Post picture of me, the bike, and the Arctic Circle sign. I even thought I could head up to Prudoe Bay. A much longer dirt road but I have seen ride reports from guys on Hayabusa’s making the trip.

I did head up in June of 2008, made it to Fairbanks, but in a twist of luck, I followed the signs instead of looking at the maps (who would have thought). The sign said that Circle was to the right, Fox Hill (or something) was to the left, and Livengood (again, or something) was straight. So I went right. Turns out I went to a town called Circle on the Yukon River. Unfortunately on my way back to the intersection, I got a flat tire and had to get a lift back to Fairbanks in order to get the bike picked up, a new tire, etc. It was certainly interesting but not quite what I wanted to do.

Anyway, since I failed to reach the Arctic Circle, I really want to try again and I think giving it a try in June of 2014 which will let me complete my goal.

This post is meant to provide a little back ground (read the ‘Alaska’ posts on http://schelin.org or the ones on the blog under the Alaska category although the schelin.org ones are being moved to the blog as part of this preparation) and as a checklist or set of goals that need to be achieved prior to the trip. Mainly to make sure I’m ready for the trip again. I’ll mark the goals as Optional or Required and use the ‘strikeout’ option in the blog to mark items as completed. Some can’t be fully completed until May of next year like new rear tire or chain. For the chain, I can partially complete it by getting a new chain any time prior to June.

Motorcycle Checklist:

Required:
1. Pull light bulbs to make sure connectors are clean and carbon free.
2. Check the Fuse Box to make sure all connections are marked and in use.
3. Repair the Autocomm (the cord is coming out) and test it.
4. Change oil and filter.
5. Change brake fluids (front and rear).
6. Change clutch fluid. Just checked and it hasn’t popped but it could be sponged out and fresh fluid added.
7. Remove the broken key from the trunk. Since I’ll be using the spare gas tank, I need to get the trunk off. With a broken key in the lock, it can’t be removed and in fact, it’s hard to perform maintenance on the bike with the trunk on the back.
8. New chain.
9. New rear tire minimum. The front tire is pretty new (115,014 miles) but the rear tire was put on last year (112,057 miles). With 118,000 miles now, it should last to next year with no problem but won’t be able to take a longer trip without making arrangements with the Powersports folks in Fairbanks for a replacement (hmm, an idea).
10. Check the valves and adjust if needed.
11. Adjust the Power Commander. Bike is popping too much.

Optional:
1. Replace exhaust with original exhaust.

Camping Gear Checklist:

Required:
1. Check tent. Poles and pegs. Check rope for tiedowns. Clean inside and out.
2. Check sleeping pad. The big REI one I got is a little bulky but fits the tent well.
3. Check sleeping bag. See if it needs to be cleaned prior to the trip.

Motorcycle Packing Checklist:

Required:
1. Get the saddlebag pins on. A couple broke off last time when the bike fell over. Glue them in place and mount the few new ones.
2. Check the tank bag. Last time I used the three tier bag I’d recently purchased but found it was too high for comfort. I had to use a bungee cord to hold the bag up. So check it out and make sure it is stable with just two tiers.
3. Check the tail bag which snaps into the saddlebags.
4. Check the spare tank to make sure it’s clean and ready for use. Mount it and put fresh gas in it, then use it to fill the main tank to make sure the hose is clear as well.

Riding Gear Checklist:

Required:
1. Contact Aerostich to see if I can get the front zipper repaired. The zipper split and needs to be redone or replaced.
2. Contact Gerbing to get the jacket sleeve connections repaired. The gloves don’t work when plugged in to the jacket.
3. Check the Gerbing gloves to make sure they still work.
4. Make sure I have spare visor parts as they break somewhat easily (3rd set so far). Two sets are currently on order. – Received the parts along with a couple of replacement visors.

Carl Checklist:

Required:
1. Currently I’m 20 to 30 pounds heavier than I want to be. This means losing up to 30 pounds in 8 months, 5 lbs a month. I’ll keep a running “How am I doing” post here for that putting in my current loss.
2. $1,000 more in savings.

Optional:
1. $2,000 more in savings.

Cat Checklist:

Required:
1. Check in with a cat service to come by and feed Slash, change the cat litter, and hang out with him in addition to checking on the house. Of course if Rita comes out again next summer, this may be a moot point.

General Gear Checklist:

Required:
1. Using the gear checklist, go though the items in the list making sure it’s all clean and up to date (where things can expire). Eye-wash for instance probably should be replaced every so often.
2. Make sure I have current maps.
3. Get the Milepost magazine for 2013 or 2014 and run through it for information. Most of it seems to be advertising but there’s some good touring type stuff in there. Since I’m planning on 3 weeks this time, I should have a bit more time to hang out for a day and explore vs just run up and back.
4. Make sure I have travel size chain lube cans, plexus, oil, and brake fluid (dot4).

That’s the list for now. I’ll continue to add to it in preparation. Let’s see how it goes.

Posted in 2014 - Alaska Trip, Motorcycle Trips | Tagged | Leave a comment

Building a Shed

Here’s the thing. I have a bunch of garden stuff in the garage. Lawn mower, shovels, rakes, bags of various fertilizers, weed killer, and of course bug killers of various sorts. It’s a bit annoying especially since I do woodworking in the garage in addition to working on the vehicles. Something has to give.

A year ago (or so), I started looking on line at various sheds looking for an idea. There are quite a few plans of course and even some pretty good ones. But I had a specific bit of space I wanted to put the shed in. I didn’t want to overwhelm the yard but I also didn’t want to get a metal or wooden box. No imagination.

I had an idea that the shed should be around 8′ x 10′. I was at Home Depot checking out the line of sheds they had in the parking lot. From the box size on up to one large enough to hold horses 🙂 In the first barn was a bunch of brochures. As I browsed through it, I found this one:

And an example of the interior:

This actually was interesting. It fit in with being a little different but it also was interesting in that it could be used as a workshop as well. Either I can get further into gardening or in the event I sell the house, the next person will find the shed much more appealing than a box. And of course I think it enhances the curb appeal 🙂

I broke out the rake and cleaned up the space I had for it. This is next to the neighbors (no fence between us) and that’s his garden. I chatted with Gordon because I also didn’t want to impact his garden. I showed him the brochure and my plan. I also watched the sun and didn’t see that the shed would be much, if any issue with his garden.

I staked out the spot just so I’d have an idea where it should be and to make sure it’d fit.

I went in a few weeks back and ordered the shed from Home Depot. It comes as a kit with everything precut but you have to do all the assembly. Hammering nails, screwing in the screws, painting, etc.

I checked with the city just to make sure I was following ordinances. They gave me a pamphlet of the materials I needed. It said that since it was under 120sqft, I didn’t need a permit. It did say I needed a Plot Plan with street, sidewalk, power lines, drainage, and of course the location of the shed (it said ‘shed’ in the paperwork), an electrical plan, a green plan, an architectural plan with elevations, and a framing plan with wood designations. Plus it had to be stamped by a Colorado Engineer. Well, I figured I could at least get a plot plan going, plus I’ve been wanting one for myself so I could lay out the garden. Since I took Architectural Drafting in high school and was a draftsman in the military, I still had all my gear (I’m not a packrat 🙂 ).

I actually kind of enjoyed it. But finally on Friday I stopped in at the city office again with the pamphlet from Home Depot and the paperwork from the City and confirmed again that I needed all this. She said I did but after showing her the brochure, she stepped into the back and when she returned, she said that as long as it’s under the 120sqft limit, I didn’t need any of the paperwork. I suggested that information be put into the brochure for the next guy.

Looking at this from completion, there are three suggestions to improve the experience.

1. List all the extra components necessary for completion up front.
2. Make sure all the pieces are properly marked. It took a bit to figure out the trim pieces for either side of the door.
3. Paint all the pieces before assembly. There are only a couple of pieces that are glued in addition to being nailed in place. The rest are just nailed in. It makes it a lot easier in the long run and a cleaner looking job when done.

It said in the brochure that you’d need to provide the shingles and paint with a suggestion of 3 bundles of shingles and a gallon and a half of paint. Technically you need to buy:

1. If you have the floor piece and want extra support (the default is 24″ between joists), that is boards every 12″ instead of the default of 24″, you need to buy extra 3″ galvanized nails and the 5 extra treated 2×4’s.
2. Purchase 1/2″ copper or PVC pipe (approximately 8′ long but it’ll be trimmed a tad).
3. Roofing nails aren’t supplied either.
4. Drip trim isn’t supplied and will need to be purchased.

I do note that the panels next to the door weren’t flush with the 2×4’s on either side of the door. I wasn’t comfortable leaving a gap so I trimmed a couple of pieces of scrap approximately 1/2″ wide to put under the left and right door trim so they’d be sturdy.

On the 23rd, the bundle arrived. The delivery guy backed it into my garage, dropped it off, and was on his way.

Once he was gone, I of course started taking things apart. The top smaller “box” was the floor. But it’s a bunch of precut, primed wood with things cut at the correct angle (which is generally the hardest part).

I used the book and lined up all the pieces in order. There were a few pieces I was unable to find but I felt that I’d discover them when needed vs hunting the down.

With the pieces lined up, I started in on the instructions. I figured I’d build the walls in the garage and just move them out to the yard on the following day (Saturday). Honestly, it’s very very simple. The pieces were marked on the sides to match the instructions. So you knew which pieces went where. For the bigger pieces, it was pretty obvious.

Nailed together

After adding the paneling

It’s just that simple.

I spent the night looking over the instruction booklet (it’s on the wall of that last picture) just to see what I needed. One of the reviews suggested the PVC or copper before putting the shed together. Fortunately I had a piece already from a gardening project a year or so ago. The floor plan suggested using additional pretreated wood if you wanted support to park a motorcycle or heavier lawn mower. Since it’s easier to put the pieces in now than later, I thought it’d be a good idea to do this.

Saturday morning dawned and since I’m an early riser, I headed over to Home Depot to get the additional support beams and nails. I also got some weed blocker to go under the shed. No point if having some weed grow through the floor 🙂

When I got home, I put together the right side of the shed. One of the problems with the left side is it was too heavy for one person or two if one is small (like Rita 🙂 ). So I decided to put the frames together and move them out to the back yard and then put the panels on. That worked a lot better. I also put down the weed blocker and the pieces for the floor.

I put the front wall and back wall frames together next

I snagged the neighbor (John from the other side) and we moved the assembled left side out.

Since he was there and I’d put the panels on the front and rear walls, I went ahead and nailed in the left side and front wall

Then put in the back wall and put up the right side wall.

I assembled the ceiling joists in the garage and brought them out to the shed but it was getting late and looked like it was going to rain so I put a tarp over the front. Rita assembled a larger tarp from the two smaller ones and put them over the back.

I was bleeding exhausted. I was so tired I had a hard time just picking up the trash and other bits from the yard before going inside to shower and take a quick nap on the couch. We did head over to the new Thai place for dinner after I woke up. Very very good food.

Sunday morning dawned and we were ready to put the roof up. Rita held each one up and basically steady while I screwed in the base of each one. They were 3″ screws and could have used some wax to ease the way. As it was, I had a hard time getting the screws in but eventually they all were all in place. There were spacers to make sure they were in the right place. We put the joists up from outside in and it turned out the spacers were just a tiny bit wide so I had to trim them down 3 or 4 skoshes 🙂

Rita put the top piece into the slots on the joists.

There were spacers for these as well to make sure the top was properly spread apart. I screwed them into place and it’s ready for the roof.

I was going to get help from John in putting the sheet of plywood up for the roof but he was unavailable and I found it easier to just nail in some nails at the base of each of the joists and heave the board up myself.

Rita helped me steady the board while I nailed in the center piece. Then I finished nailing the board up across the joists. Note that the side pieces are up and the 1/2″ PVC is running through the support pieces. This will be used for hanging plants (as seen in the picture).

Next was the smaller piece lower than the main piece.

Then the piece on the other side above where the windows go. It looks like I have a shed firming up here 🙂

I put the windows in for a fit check. Turns out the lower board was a bit warped. I had to pop it out and give it a good push down before nailing it back in and the windows fit after that. You can see the right most window at the top isn’t seated in the opening and you can barely see the curve to the bottom board under the windows.

Rita had to bail and she took the truck with her. Unfortunately I didn’t realize I needed to get drip trim until after she left. I even went over on the bike because I thought the trim was in a roll but no such luck. Upon return, I decided to just paint. It took 4 hours (roughly) to get the outside done.

I pulled the windows out but it looked like rain again so I covered the shed with some painters tarp (really really thin) and put the tarp on the back. Rita put the extended tarp on the front.

Tuesday and the carpet guys are coming out. I worked for a few hours until they showed up and then spent the rest of the time working on the shed. First I put the windows in. They needed strips of foam for a weather seal and the drip trim put in place before the windows can be mounted.

It was a bit precarious but I got it done. The windows aren’t screwed in but are held in by the foam strips and a strip of metal that’s screwed in over the top. I had to use the big ladder to screw in the top center part.

Once they were in, I started putting the shingles in. The boards already had lines so it was pretty easy to put the shingles up. It was a bit satisfying as well as the windows and shingles were the two main pieces needed so I didn’t need to put tarps on again.

I had to fight the needles and trim a branch because it was just too low. I didn’t want to trim the tree too much as I wanted the shed to look natural.

I had to trim the top pieces and put them in place for the last bit. The black bit at the left end bothers me so I’ll eventually fix it. There’s nothing wrong, it’s just the tail end of one of the pieces.

Wednesday I simply put in the vents. It was a bit of a pain but not horrible. Just a bunch of screwing this time. My arm was fairly sore the next day though.

Thursday and Friday I painted. It was suggested that if I wanted to actually use the shed as a greenhouse, I would need to paint the interior. Since I had two cans of the exterior paint, I figured to use it up inside. Since no one will actually be living in it, I didn’t see a problem using exterior on the inside. But I wanted to get the inside finished before Saturday since I had a door to mount and the floor to do along with various accessories once the shed was done.

I didn’t quite get the painting done Friday but I was close enough. I still had a few bits left for touch up but the biggest bits were done.

Saturday after shopping, with Rita’s help I got the door mounted. I had to mount the strip pieces first and Rita actually screwed in the two bottom screws but it was in and ready for use.

Since all the hammering was done, I mounted the sun medallion Rita picked up somewhere and left behind.

And put the wind medallion we received as a wedding present years ago. Both look good in my opinion 🙂

Finished painting the inside too.

Looking a lot better now, eh?

Sunday I got the door painted and the hardware mounted. It was actually incorrectly placed so I filled in the hole and lowered it a bit moving it a bit closer to the door jam.

I finished touching up the inside pieces.

I put the door supports on the inside as directed. They firm up the door so it doesn’t flop or warp.

Next I created a workbench from the scrap 4×8 sheet used for protection.

Then I removed one of the shelves from the garage and added a few mounts here, trimmed the board and mounted it.

Next, the floor. Rita suggested a vinyl floor vs a painted one. Excellent idea. At Home Depot, I picked up a roll suitable for a hot shed (lots of vinyl is very soft and would deform in such a hot place). I bought a spreader and adhesive. Sunday I spread it out and using a 2×4 and a straight edge plus a knife with a brand new blade (I cut my hand on the silly thing), I placed the vinyl and trimmed it to fit. I left it overnight to settle.

Monday I spread the adhesive. It turns out I needed more than one container. The floor (like the rest of the walls) is made of the pressed scraps vs particle board so there are lots of pits and dips to collect adhesive so I needed more. I rolled half of the vinyl back and put the first container of adhesive down.

Then positioned the vinyl and rolled it down. Then I zipped over to Home Depot for the second container plus a putty knife and more of the green paint. I had just enough to almost finish the workbench. I laid down the other half of adhesive.

Then rolled it down as well.

I trimmed the kick piece I wanted to protect the doorway so it would fit and put it in place.

And it’s done! Well, actually I have a couple of tiny things to do but in general the shed is done. I want to put up a small piece of pegboard and some mounting boards for the shovel and other long tools but it’s basically done.

Posted in Building a Shed, Home Improvement | Tagged , , , , | 2 Comments